

Integrating Firebase to your Flutter app using FlutterFire CLI
Learn how to easily integrate Firebase into your Flutter app directly from your terminal using the power of FlutterFire CLI


Firebase is a Backend-as-a-Service platform that provides tools that allow developers to develop high-quality mobile and web apps quickly and easily. It started as a YC11 startup and was later acquired by Google in 2014.
Firebase provides a range of easy-to-use services and features, including real-time databases, cloud storage, hosting, machine learning, analytics, and others. These services can be used individually or together, based on the specifications of the app being developed.
Using Firebase in your Flutter projects is very easy, as both technologies are developed by Google and are continuously designed to work together seamlessly.
There are several ways to integrate Firebase into a new or existing Flutter project, in this article, you will be learning how to easily integrate Firebase directly from your terminal using the power of FlutterFire CLI.
Now that you have an insight into what we want to learn, let us begin.

Prerequisites
To implement Firebase on your project, some things have to be put in place.
Download and install any editor or IDE of your choice.
Install Flutter for your particular OS (Operating System).
Make sure you're signed in to Firebase using your Google account.
Install (node package manager) npm on your device.
To install npm, visit the npm download portal, under the LTS (Long Term Support) section, and click on the downloader for your device.
Note: To check if you have successfully installed npm, run
node -vto check the Node version andnpm -vto check the installed npm version. If these commands run successfully, you have been able to install npm.
It is important to note that these prerequisites are only necessary for the first time connecting your project to Firebase, for subsequent times, you can skip these steps.
Install and Activate FlutterFire CLI
FlutterFire CLI depends on the underlying Firebase CLI, hence, you need to install the Firebase CLI by running this command in your terminal:
npm install -g firebase-tools
Once the installation is done, you can check if it was successful by checking the version of your firebase through firebase --version. If this shows you the version of your firebase, then the previous command was executed successfully.
Next, go ahead to log in to your Firebase account through the terminal by running the:
firebase login
This should take you to your browser to select the Google account that you used in accessing your Firebase console.
Then, install the FlutterFire CLI by running the following command:
dart pub global activate flutterfire_cli
Note: When you're installing this for the first time, your device will ask you to add the pub executable's path as an environment variable.
On Mac, you only need to copy the path which will look like this, $HOME/.pub-cache/bin to PATH by running the command:
export PATH="$PATH":"HOME/.pub-cache/bin"
On Windows, the path will look something like this, C:\Users\yourUserName\AppData\Local\Pub\Cache\bin you can just copy this path from the warning message and add it as an environmental variable.
With this, you are done installing the FlutterFire CLI and it is ready for your use.

Configuring Your Project to use Firebase
All the steps mentioned above are only needed for the first time and after that, you can always configure your next projects easily with the steps shown below.
- You need to either create a new Flutter project on your IDE or open an existing project that you want to integrate Firebase into. In the IDE's terminal for your project (or in your terminal, cd into your project's folder), run the command:
flutterfire configure
This will fetch all the Firebase projects linked to your logged-in account. You will also find below the list, <create a new project> use the arrow keys to navigate down to this option and click on Enter.
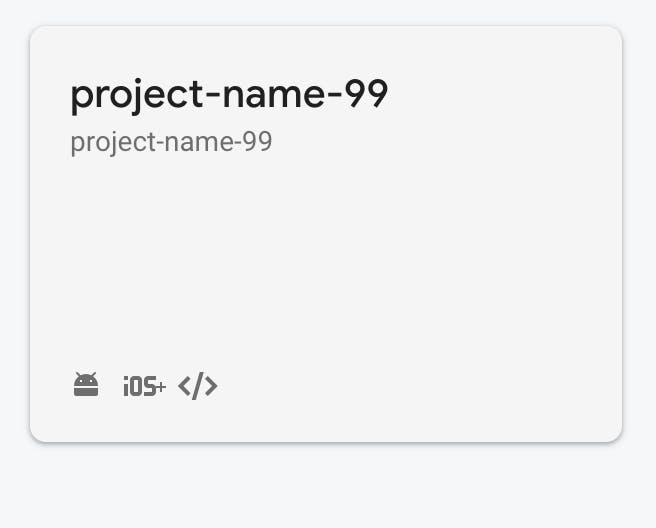
- You will be prompted to enter a unique project id, enter the project id of your choice.
Hint: Use a combination of your project's name and some random figures, e.g. project-name-99 to avoid any errors
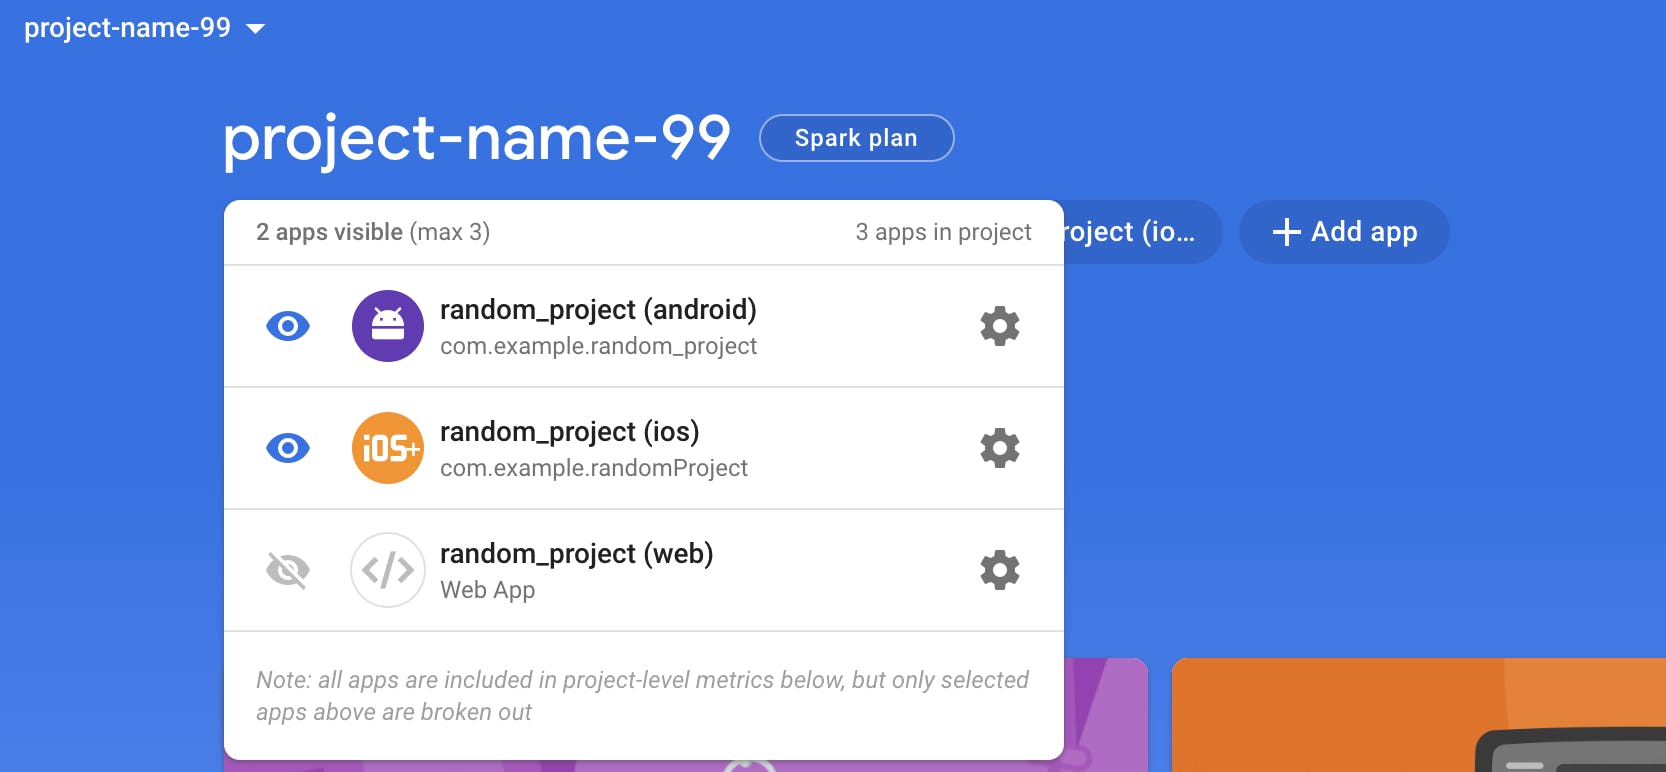
- When the project is successfully created, you will be asked to choose which platforms your configuration should support.

Click on Enter after you have selected the platforms of your choice and follow the prompts that follow accordingly.
To confirm that your project has been created and configured successfully, you can go into the Firebase console to check. You will find the new project on the tile containing your other projects (if there are any):
And when you click the tile, you can also check the platform you clicked to support:
Also, back in your IDE, you will observe a new firebase_options.dart file has been created in your lib folder.

Note: This file might contain some errors at this point, don't worry, we'll fix that soon.

Finishing Steps
At this point, you only want to finish what you started.
To fix the error inside the firebase_options.dart file, you only need to install the firebase_core package from pub. You can either add it under dependencies in your pubspec.yaml file or install it by running the command below in your terminal:
flutter pub add firebase_core
Finally, in your main.dart file:
Import the
firebase_corelibrary andfirebase_options.dartfileMake the main function asynchronous
In the main function, before the runApp function, add the following code:
WidgetsFlutterBinding.ensureInitialized();
  await Firebase.initializeApp(options: DefaultFirebaseOptions.currentPlatform);
You should have something similar to the following:
void main() async{
  WidgetsFlutterBinding.ensureInitialized();
  await Firebase.initializeApp(options: DefaultFirebaseOptions.currentPlatform);
  runApp(const MyApp());
}
And that's a wrap.
Conclusion
In this article, you have learnt, in a step-by-step format, how to easily integrate Firebase into your Flutter project directly from your terminal. Although the first time implementing this approach might look tasky, you will eat up subsequent integrations like a piece of cake. Why not try this approach in your next Firebase integration?
See you in my next blog post. 👋